
Some Backstory
Over the past year, I've been working on a set of online video tutorials for WebdriverIO.
In it, I cover many details of WebdriverIO, including a multitude of commands and how WebdriverIO integrates with many systems out there.
While I'm happy with the content so far, I felt like doing something a little extra outside of it.
One common theme I hear in regard to testing is, "yeah, I'd love to start testing, but we just don't for some reason".
In an effort to try and improve that, I spent some time thinking about what could help people get over that initial hurdle keeping them from writing tests.
There are plenty of tutorials out there on how to write a basic test, but they don't seem to really help get people past that initial resistance. There's something about translating the abstract knowledge to concrete websites that's just tricky.
So I had an idea: What if we put together a ready-to-go set of tests for folks so that get that first step out of the way?
What if someone could go to a site, answer a few prompts, and be given a set of tests to get them started?
And what's one thing almost all websites have? A login form.
I threw together a landing page and let the idea percolate a little (really, I was just too busy making the video tutorials to dedicate time to the idea). A few folks signed up, which was enough to show me that people were interested in the idea.
I do plan on creating the script that will auto-generate the WebdriverIO scripts for folks based in input, and I'll update this page when it's ready.
Edit: It's ready
In the meantime though, here's a full, in-depth tutorial on how to write tests for your login page:
The "Test your Login" WebdriverIO Tutorial
Step 1: Install WebdriverIO
If you haven't messed around with WebdriverIO, I'll quickly explain that it's a functional test automation framework. It allows you to script out page actions to take in a browser, and validate that the actions had the desired affect.
There are lots of reasons I love WebdriverIO, but I cover them in another article.
Before I get to installing WebdriverIO, you need to have a recent version NodeJS and be in an NPM package.
I won't cover the first item (it varies greatly by system and there are plenty of tutorials out there already), but if you aren't in an NPM package, you can quickly set one up by opening up a command prompt and running:
npm init -y
So long as you have those two things, you can install WebdriverIO by running the normal NPM command for such things:
npm i --save-dev webdriverio
Shortcut command
With it installed, I like to add the command to my package.json scripts section:
...
  "scripts": {
    "test": "wdio"
  }
...
Then I can run WebdriverIO with:
npm test
You can skip this step if you'd prefer and just run WebdriverIO with the following:
./node_modules/.bin/wdio
Configuration
Next, we'll want to set up our WebdriverIO configuration file. Since we haven't created one yet, WebdriverIO is smart enough to figure that out and help us through the process. Here are the answers I chose:
- Where do you want to execute your tests? On my local machine
- Which framework do you want to use? mocha
- Shall I install the framework adapter for you? Yes
- Where are your test specs located? ./test/**/*.js
- Which reporter do you want to use? spec - https://github.com/webdriverio/wdio-spec-reporter
- Shall I install the reporter library for you? Yes
- Do you want to add a service to your test setup? selenium-standalone - https://github.com/webdriverio/wdio-selenium-standalone-service
- Shall I install the services for you? Yes
- Level of logging verbosity silent
- In which directory should screenshots gets saved if a command fails? ./errorShots/
- What is the base url? http://testyourlog.in/example
You'll probably want to replace the test URL with whatever page you want to validate.
We have a few more steps to go for our first test.
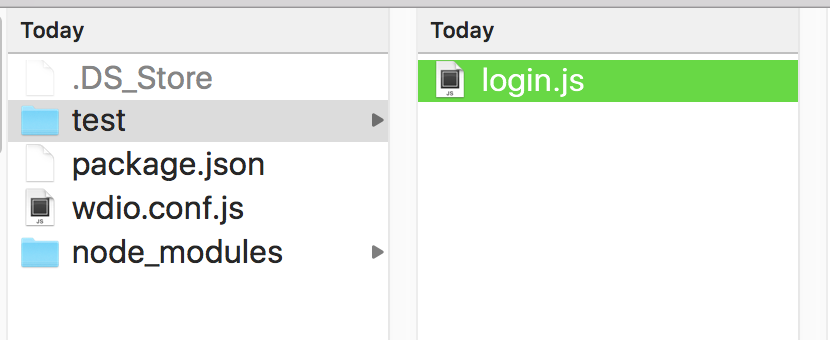
Folder & File set up
We told WebdriverIO that we've got our tests stored in the test folder. Go ahead and create that folder if you haven't already. Then, create a file called login.js and open it up in your favorite text editor.
WebdriverIO can be set up to use Mocha, which is what I did in my configuration answers earlier. This helps organize our tests and process the test results.
Mocha uses two functions, describe and it, to add hierarchy to test suites. If you're unfamiliar with them, check out these two resources.
For our needs, we'll set up the following:
describe('Login Page', function () {
  it('should let you log in', function () {
    // our tests will go here
  })
})
You do need both describe and it, as that's the hierarchy Mocha excepts. The it goes inside the describe block. Inside of the it block we'll put our tests.
All set up and ready to dance
Okay, we've got WebdriverIO configured and our test file laid out. Let's write our first test.
We're checking out a basic "happy path" scenario: The user enters in valid credentials for an active account.
There are four unique steps to this test:
- Go to the login page
- Enter valid credentials
- Click submit
- Validate we're logged in
Let's go through these one at a time.
Going to the login page
The basic way to move to various pages in WebdriverIO is to use the url command. If you pass in text to it, WebdriverIO will tell the browser to that specific webpage.
You could pass in the entire URL of the page you want to test, but since we've already defined the domain we're testing on (see config generation above), all we have to pass in is the path.
That looks like:
it('should let you log in', function () {
  browser.url('/');
})
The path you use will depend on where your login page lives. Maybe it's part of your homepage (like ours is). Maybe it's some complex URL that users have no hope of remembering.
Whatever it is, just use the right one :)
Entering valid credentials
Now that we're on our login page with our login form, we need to enter our username/email and password.
The command we need to use for this is called 'setValue'. It works by accepting an element selector and a text value to insert in said element.
it('should let you log in', function () {
  browser.url('/');
  browser.setValue('input[name="email"]', 'valid@user.com');
  browser.setValue('input[name="password"]', 'hunter2');
})
For our element selectors, we use a combination of an HTML element and an HTML attribute. If you're not familiar with selecting elements in WebdriverIO, you're definitely going to want to read up on it.
Again, update your selectors and credentials with what's right for your site.
Clicking Submit
Okay, we've gone to the login page and have entered our credentials. Let's finish logging in.
There are a couple of ways to do this:
- Click the 'login' button
- Submit the 'login' form
Either way should work for you site, but here is the code for both options just in case:
Click the 'login' button
We can 'click' and element by using the click command. That just makes sense, right?
All we need to do beyond calling the command is pass in a selector defining what element we want to click. This will trigger Selenium to fake a mouse left click in the center of that element.
it('should let you log in', function () {
  browser.url('/');
  browser.setValue('input[name="email"]', 'valid@user.com');
  browser.setValue('input[name="password"]', 'hunter2');
  browser.click('.button=Login');
})
Woah, what is that =login selector?! Turns out, you can select elements by the text those elements contain.
WebdriverIO is so cool.
Submit the 'login' form
If clicking your login button isn't an option, perhaps submitting your login form is. To do that, we'll use the submitForm command.
Oh my gosh, these command names are so cliché.
Just like click, submitForm takes a selector. The element provided can be the form itself, or any element that is a descendant of the <form> element.
That means we could use one of our text input selectors from above.
Did I mention WebdriverIO is cool?
it('should let you log in', function () {
  browser.url('/');
  browser.setValue('input[name="email"]', 'valid@user.com');
  browser.setValue('input[name="password"]', 'hunter2');
  browser.submitForm('input[name="email"]');
})
This is super handy if you don't have a decent selector available for the form or button elements.
Validating we're logged in
If all has gone well, we should be logged in now. But how do we really know?
If we were to run our test, the login page would quickly flash by, and we may miss visually verifying things worked out as planned.
Instead, we're going to use 'assertions' to check the status for us.
I tried looking up a good explanation of assertions and couldn't find one. Sigh.
The simplest way I know to explain assertions is to say that:
- You give the computer some unknown value (like a variable)
- You give the computer a known value (like the number 9)
- You tell the computer to validate the relationship between those two values. Examples:
- The variable should equal 9
- The variable should not equal 9
- The variable should be bigger than 9
If the value of the variable is 8, only the second assertion will pass (8 does not equal 9).
Usually the variable is the result of some code function you want to test. Maybe you have a function that calculates the square of a number (called calcSquare).
Your assertions would be:
assert.equal(calcSquare(3), 9); // 9 == 9
assert.notEqual(calcSquare(2), 9); // 4 != 9
Both of those assertions will pass, assuming the calcSquare function is working correctly.
We can use assertions in many ways in WebdriverIO. For our current needs, we want to validate that the url of the page we're on is either:
- not the same as the login url
- the same as the url after logging in
The first is a more general test, and may result in a false positive (the test passes when it shouldn't) if the login takes you to a different page without logging you in (for example, a 'forgot your password' page).
The second option is a better one, but requires knowing the url of the page you get logged in to.
Thankfully, I know that URL for my example. But just in case, I'll should you both assertions.
First, we need to get the URL of the page we're now on (WebdriverIO is smart enough to wait for the page to reload after submitting the login form).
We get that url with the getUrl command.
it('should let you log in', function () {
  browser.url('/');
  browser.setValue('input[name="email"]', 'valid@user.com');
  browser.setValue('input[name="password"]', 'hunter2');
  browser.submitForm('input[name="email"]');
  var pageUrl = browser.getUrl();
})
We don't pass any value in to the getUrl command. We simply assign the result of it to a pageUrl variable.
With it, we can now run our assertions:
it('should let you log in', function () {
  browser.url('/');
  browser.setValue('input[name="email"]', 'valid@user.com');
  browser.setValue('input[name="password"]', 'hunter2');
  browser.submitForm('input[name="email"]');
  var pageUrl = browser.getUrl();
  assert.notEqual(pageUrl, 'http://testyourlog.in/example/');
  assert.equal(pageUrl, 'http://testyourlog.in/example/logged-in.html?email=valid%40user.com&password=hunter2');
})
I include both assertion types here, but you should really only need to include one.
Wait.
Where did this magical assert come from?
Nowhere, yet!
Yes, I neglected to mention the minor detail of loading Node's 'assert' library.
Thankfully that is pretty easy. Just shoot up to the top of your file and add:
var assert = require('assert');
Now you're ready to party.
Here's the full script just for easier reference:
var assert = require('assert');

describe('Login Page', function () {
  it('should let you log in', function () {
    browser.url('/');
    browser.setValue('input[name="email"]', 'valid@user.com');
    browser.setValue('input[name="password"]', 'hunter2');
    browser.submitForm('input[name="email"]');
    var pageUrl = browser.getUrl();
    assert.notEqual(pageUrl, 'http://testyourlog.in/example/');
    assert.equal(pageUrl, 'http://testyourlog.in/example/logged-in.html?email=valid%40user.com&password=hunter2');
  });
});
Let's run our tests already!
We've got our test written and our assertions in place. Time to try it all out.
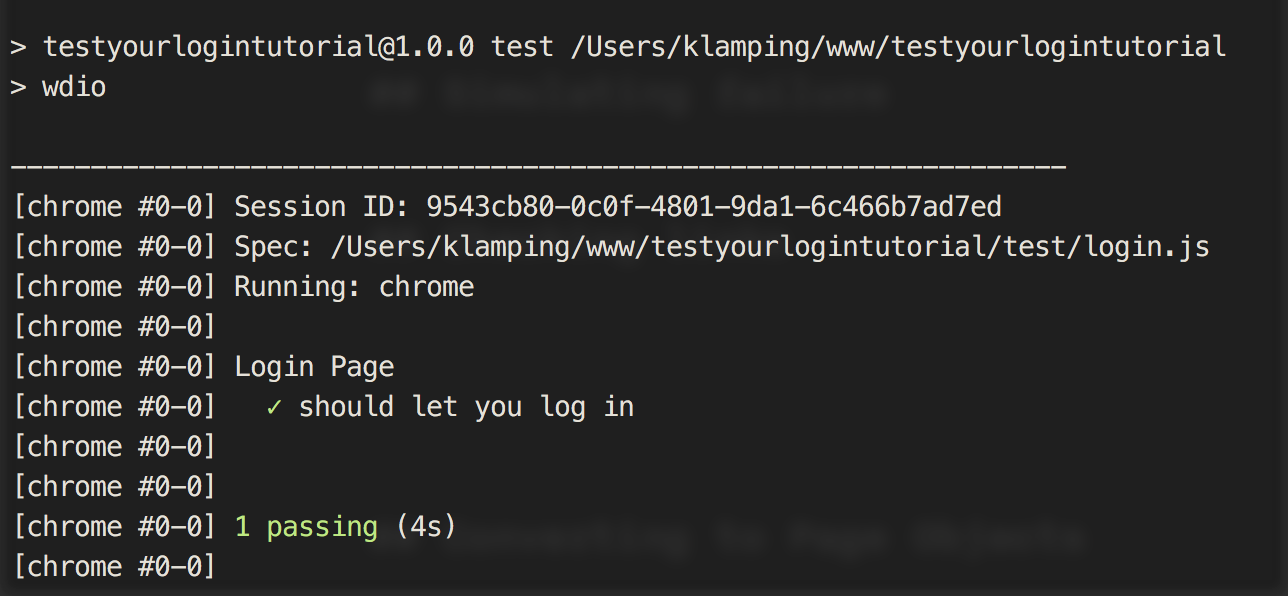
In a terminal window (or command prompt if you prefer to call it that), run your npm test command again (or ./node_modules/.bin/wdio if you didn't set up npm test like I did).
If everything is set up correctly, you will see a Firefox browser momentarily pop up on your screen.
A quick tip. It's a pretty common thing that the latest version of Firefox doesn't work with Selenium. If you run in to an issue where Firefox opens but doesn't do anything, either downgrade your Firefox version, or switch to using Chrome (which you can do inside the wdio.conf.js file).
Hopefully your test completed and passed.
That's it for now
There's more to test on our login page, and we'll also want to try out using Page Objects. But this is about all I can type on the subject for now.
Sign up for updates at http://testyourlog.in/ and I'll send an email your way when I have them.
Oh, and if you are interested in learning WebriverIO in-depth, check out my video series on WebdriverIO, where you can access the first module (4+ videos) for free.