
Using WebdriverIO and Applitools to visually test your website
I'm a front-end developer.
I love how visually appealing my job can be. I get to transform beautiful designs into fully-functioning websites.
But I hate how that beautifully working website can so easily turn into a mess with just a single code update.
I also hate how that mess can hide in the metaphorical corner for days or weeks until it's finally discovered by a customer or client.
While many teams validate their sites through a combination of manual and automated testing, design defects often sneak in due to the complexity of visual testing.
Manually checking the design of every page is difficult and time consuming, and humans aren't all that great at noticing small differences over large areas anyway.
To add on to that, most automated test libraries don't have the functionality needed to address visual testing at a large scale. While Selenium-based tools can capture screenshots of the page being tested, that's not nearly enough to run an real automated visual testing suite.
That's why Applitools is one of my favorite tools for visual testing. It comes with a suite of features that enable teams to capture and conduct visual reviews.
Recently, Applitools released a new SDK for WebdriverIO, which is my Selenium test library of choice.
Wait, what's WebdriverIO?
WebdriverIO is a JavaScript library for working with Webdriver, which is the "remote control" interface that runs behind the scenes of Selenium.
WebdriverIO is not the only JavaScript-based Webdriver interface out there, but I firmly believe it's the best.
There are a couple of reasons for this:
It's "front-end friendly"
Unlike a lot of Selenium tools out there, WebdriverIO is written entirely in JavaScript. Even the Selenium installation is done through an NPM module.
I always thought browser automation meant figuring out how to get some complex Java test suite running, which just never sounded appealing to me. As a front-end developer, my strength lies in JavaScript and CSS, and WebdriverIO encourages this.
Not only does WebdriverIO let me write in a language that I'm familiar with, it also integrates with the same testing tools that I use for unit tests (e.g. Mocha/Jasmine/CucumberJS).
I believe that Front-end developers should write tests for their code (both unit and functional). WebdriverIO makes it incredibly easy for them to do.
It Strives for Simplicity
The commands you use in your WebdriverIO tests are concise and common sense.
WebdriverIO eliminates the need to connect two parts together that are obviously meant for each other.
For example, if I want to click a button via a normal Selenium script, I would have to use two commands: One to get the element and another to click it.
Why? If I'm clicking something, it's obvious I'm going to need to identify it first.
WebdriverIO simplifies the 'click' command by accepting the element selector right in to the command, and does the work itself to create the two Webdriver actions needed.
That means instead of writing this:
driver.findElement(webdriver.By.id('btnG')).click();
I can just write this:
browser.click('#btnG')
That saves me from having to write an overly verbose test.
It has great service integration
One of the best benefits of WebdriverIO is it's built-in service layer. The layer allows anyone to add on to already great functionality that WebdriverIO provides.
For example, there's a service that manages starting up and shutting down a local Selenium server for you. There's another set of services that better integrate WebdriverIO with third-party Selenium services like Sauce Labs.
There's even a service to help you do visual testing.
Wait, why do I need Applitools then?
I'm a big fan of the visual regression service that I just mentioned; it's a great little service and can help individuals start down the path of visual testing, all without too much effort.
But it's missing a boat-load of features that Applitools offers.
First, it doesn't have a test dashboard, which is critical to managing screenshots across a team of people.
Second, it's not "smart". With Applitools, you can define different regions, letting you handle visual regression in different ways through those regions.
The visual regression service just doesn't contain that functionality. You're stuck fighting false positives in your testing, slowing you and your team down.
That's why I was excited when I heard you can combine WebdriverIO and Applitools. I knew the power of both, and would love to see them working together.
Okay, let's get going
The first step to getting this awesome approach in place is to write some WebdriverIO tests.
Assuming we're in a NodeJS project, we'll first install WebdriverIO by running the following command:
npm install webdriverio --save-dev
With WebdriverIO installed in our local project folder, we can run the next command:
npx wdio config
This command will ask WebdriverIO to help us configure the framework. It will ask a series of questions, to which I recorded my responses:
? Where do you want to execute your tests? **On my local machine**
? Which framework do you want to use? **mocha**
? Shall I install the framework adapter for you? **Yes**
? Where are your test specs located? **./test/specs/**/*.js**
? Which reporter do you want to use?  **dot - https://github.com/webdriverio/wdio-dot-reporter**
? Shall I install the reporter library for you? **Yes**
? Do you want to add a service to your test setup?  **selenium-standalone - https://github.com/webdriverio/wdio-selenium-standalone-service**
? Shall I install the services for you? **Yes**
? Level of logging verbosity **silent**
? In which directory should screenshots gets saved if a command fails? **./errorShots/**
? What is the base url? **https://applitools.com**
Upon answering that last question, WebdriverIO will install the tools and services you requested, then create a configuration file for you (named wdio.conf.js). This configuration file will be used in just a minute to help WebdriverIO run your test suite.
Our first test
Before we do run anything, we need to create a file containing a test to run. Here's an sample script used to load the Applitools Hello World page, then log out the title of said page.
describe('my first visual test', function () {
  it('should look visually perfect', function () {
    browser.url('./helloworld');

    const pageTitle = browser.getTitle();

    console.log(`Title of page is ${pageTitle}`)
  })
});
This file is saved in the ./test/specs directory, and I named it visual.js.
To execute our test, we'll go back to the command line, then run:
npx wdio
This will initialize WebdriverIO, which will search the current directory for a wdio.conf.js file. Upon finding that file, it will load the configuration, see where we told it to look for tests, find our new file and run it. The final output will look like:
 ~/Sites/wdio-applitools-demo$ npx wdio

Title of page is Applitools
․

1 passing (10.20s)
Adding in a little Applitools
While our test works, it doesn't provide a whole ton of value. All it does is log out the title of the page, which isn't that likely to contain a defect.
While we could write a series of tests validating any number of features, that would take a lot of effort to do. Instead, we can take advantage of the awesome functionality inside of Applitools to get a quick return on our work.
First, we need to install the Applitools WebdriverIO SDK. To do that, run:
npm install '@applitools/eyes.webdriverio' --save-dev
Then, we'll jump back into our test file and add a few things to finish our setup.
First, at the top of our file, we'll load Applitools and initialize it:
const {Eyes, Target} = require('@applitools/eyes.webdriverio');
const eyes = new Eyes();
To use the Eyes SDK, you need an API Key, which you can get by registering at the Applitools site. Once you have that, login and go to the Eyes admin tool. You will find the API using the following menu:
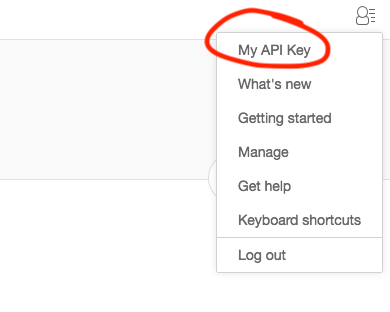
To use the key, add the following line (after the one initializing a new Eyes instance):
eyes.setApiKey('YOUR_API_KEY');
Now that we have Eyes set up, let's put it to use.
Since we're going to be doing some complex work, it's best to wrap all of our code in a try...catch block, allowing us to handle any network failures.
This is what our code looks like so far:
const {Eyes, Target} = require('@applitools/eyes.webdriverio');
const eyes = new Eyes();
eyes.setApiKey(process.env.APPLITOOLS_KEY);

describe('my first visual test', function () {
  it('should look visually perfect', async function () {
    browser.url('./helloworld');

    const pageTitle = browser.getTitle();

    console.log(`Title of page is ${pageTitle}`)

    const viewportSize = browser.getViewportSize();

    try {

    } finally {

    }
  })
});
Inside our try block, we're going to do five things:
- Open a new Eyes test
- Visually check the page
- Make a WebdriverIO call to alter the page
- Visually check the page again
- Close the test as it's complete
Here's what all of that looks like:
try {
	const viewportSize = browser.getViewportSize();

  await eyes.open(browser, 'Hello World!', 'My first Javascript test!', viewportSize);

  await eyes.check('Main Page', Target.window());

  browser.click('button');

  await eyes.check('Click!', Target.window());

  await eyes.close();
}
One important thing to notice is the use of the await keyword. await is a newer bit of functionality that helps us write cleaner tests by telling NodeJS to wait until the command has finished processing.
In order to use the await keyword, we need to define the function as async.
Thankfully that's easy to do.
In our it declaration, update it to include the async keyword:
it('should look visually perfect', async function () {
Almost ready
There's one last thing to do before running our newly updated test.
Because tests can break and networks can have issues, if we don't catch those outages, Applitools may show a failed test as "running" (since it was never told it was done running).
To avoid this, we're going to take advantage of that finally block to do some test cleanup. It will look like:
finally {
  await eyes.abortIfNotClosed();
}
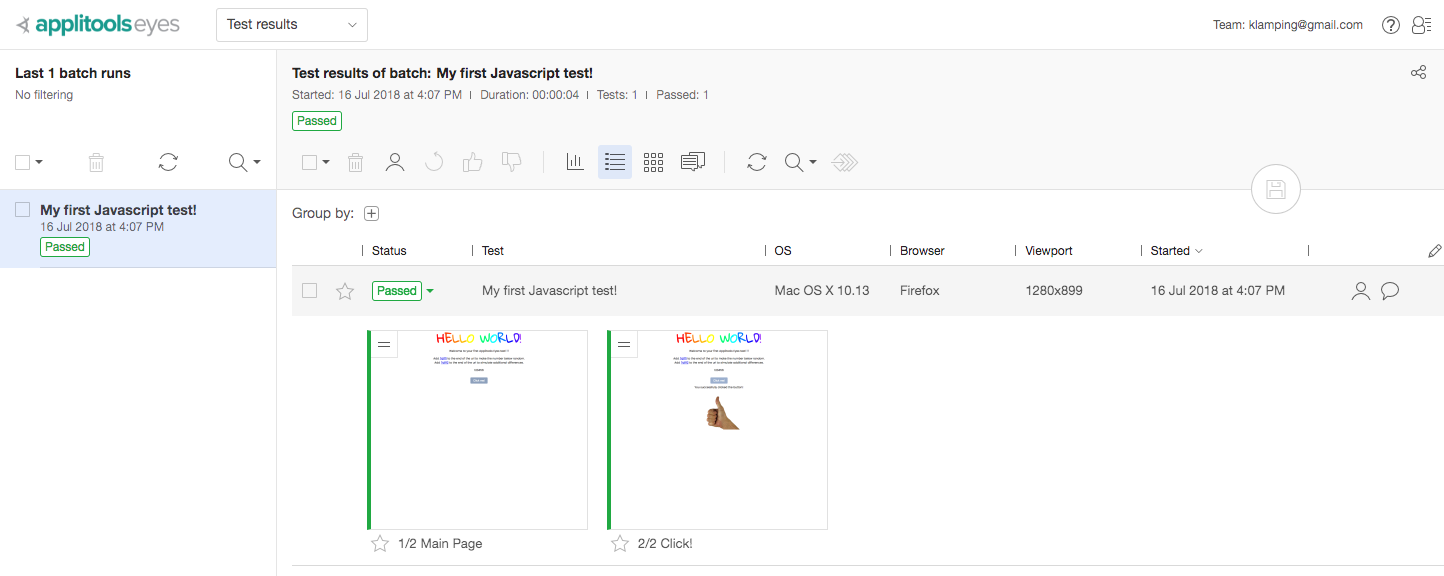
With all of this in place, we finally have all the parts need to run an amazing automated visual test. We'll kick it off by running the npx wdio command again.
The output is going to look about the same, but if we go to our Applitools dashboard, we'll now see the results of our visual validation:
Capturing failures
The first time we ran our tests, Applitools created a set of baseline images to use for future runs.
If things go well, our next series of tests runs will match that set of baseline images, but we should ensure our tests fail if they don't.
Thankfully, WebdriverIO already handles this scenario, and we can make one small change to double-check that.
In our browser.url call, let's update the page to load a slightly different view:
browser.url('./helloworld?diff1');
This is a variation of the Hello World page, with a different number near the bottom. It's great example of a small visual change that may go undetected.
Running our tests again, we'll see our visual error be caught:
Title of page is Applitools
F

0 passing (14.90s)
1 failing

1) my first visual test should look visually perfect:
Test 'My first Javascript test!' of 'Hello World!' detected differences!. See details at: https://eyes.applitools.com/app/batches/00000251870526458572/00000251870526458181?accountId=st1DOzXoArpZcmkVYWMrt2u0G2A2gcBBAresB13CKDc110
We can go to the URL and see the culprit of our failure:
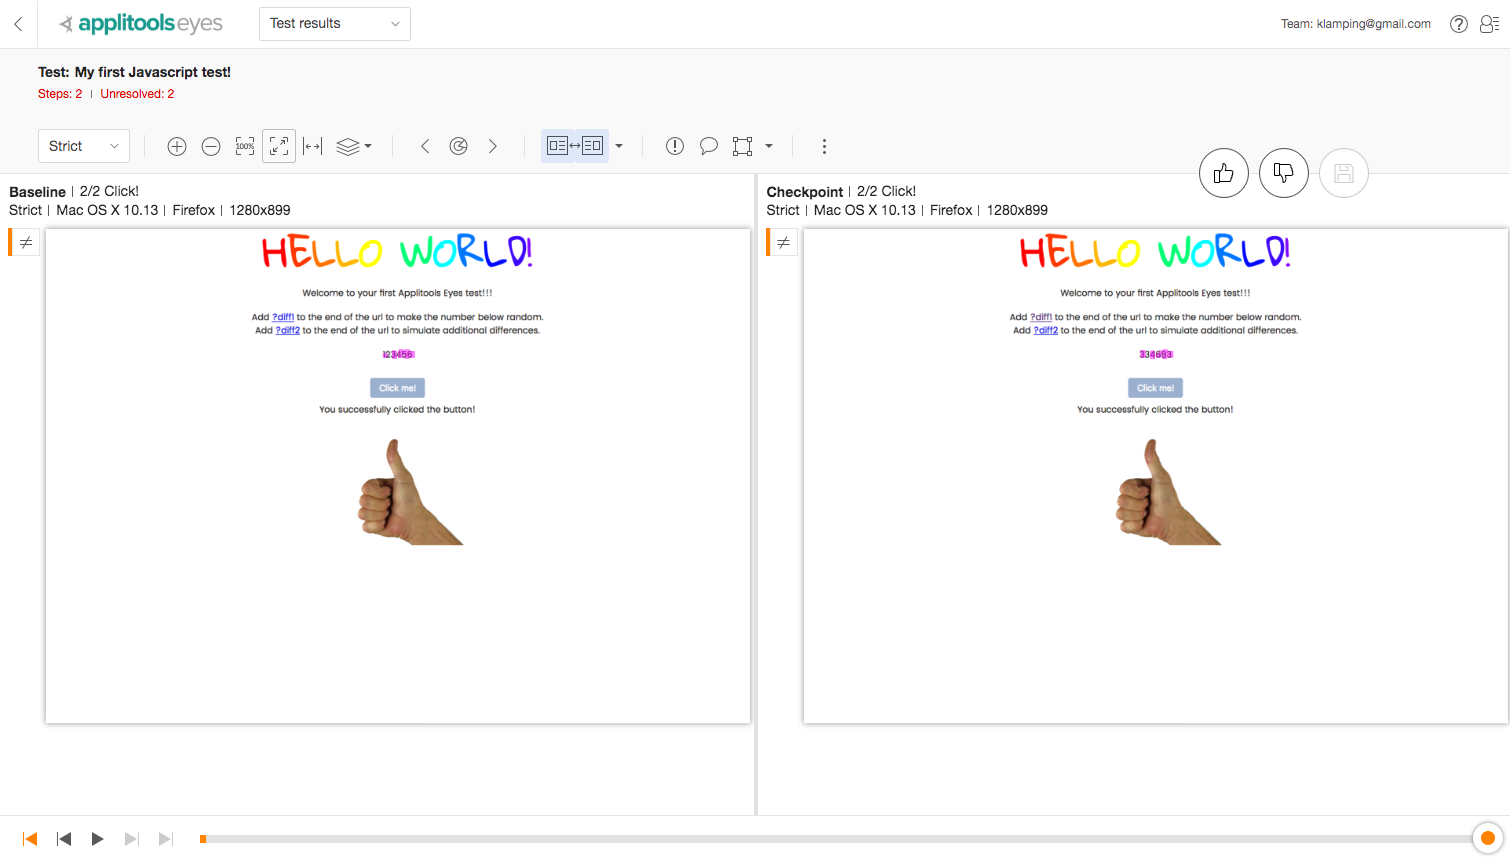
At this point, we can chose to update the baseline, create a smart region for it, or mark the test as a failure and update the team.
If you'd like to try this out without writing the code yourself, hop on over to the GitHub page, do a git clone then npm install and finally npx wdio.
Summary
Both Applitools and WebdriverIO are amazing tools that have so much more to offer than what I covered here. Hopefully this gets you going with both tools, allowing you to take advantage of the base functionality each one provides.
Header Photo Credit Josh Calabrese